Onde's Web app lets your customers place orders in their browser without downloading anything to their phone. With a web booking widget, you can build the same ordering experience directly into your website.
Our widget builder allows you to create a custom widget that is linked to your Web app.
To access the widget builder, take your default Web app URL and add /widget/builder after it. For example, if we use the demo mode Web app URL, the link will look like this: https://demo.ondelight.app/widget/builder
Alternatively, go to My hub→Applications & services→Web app and press the Customize your widget button.
The widget builder page is divided into two sections:
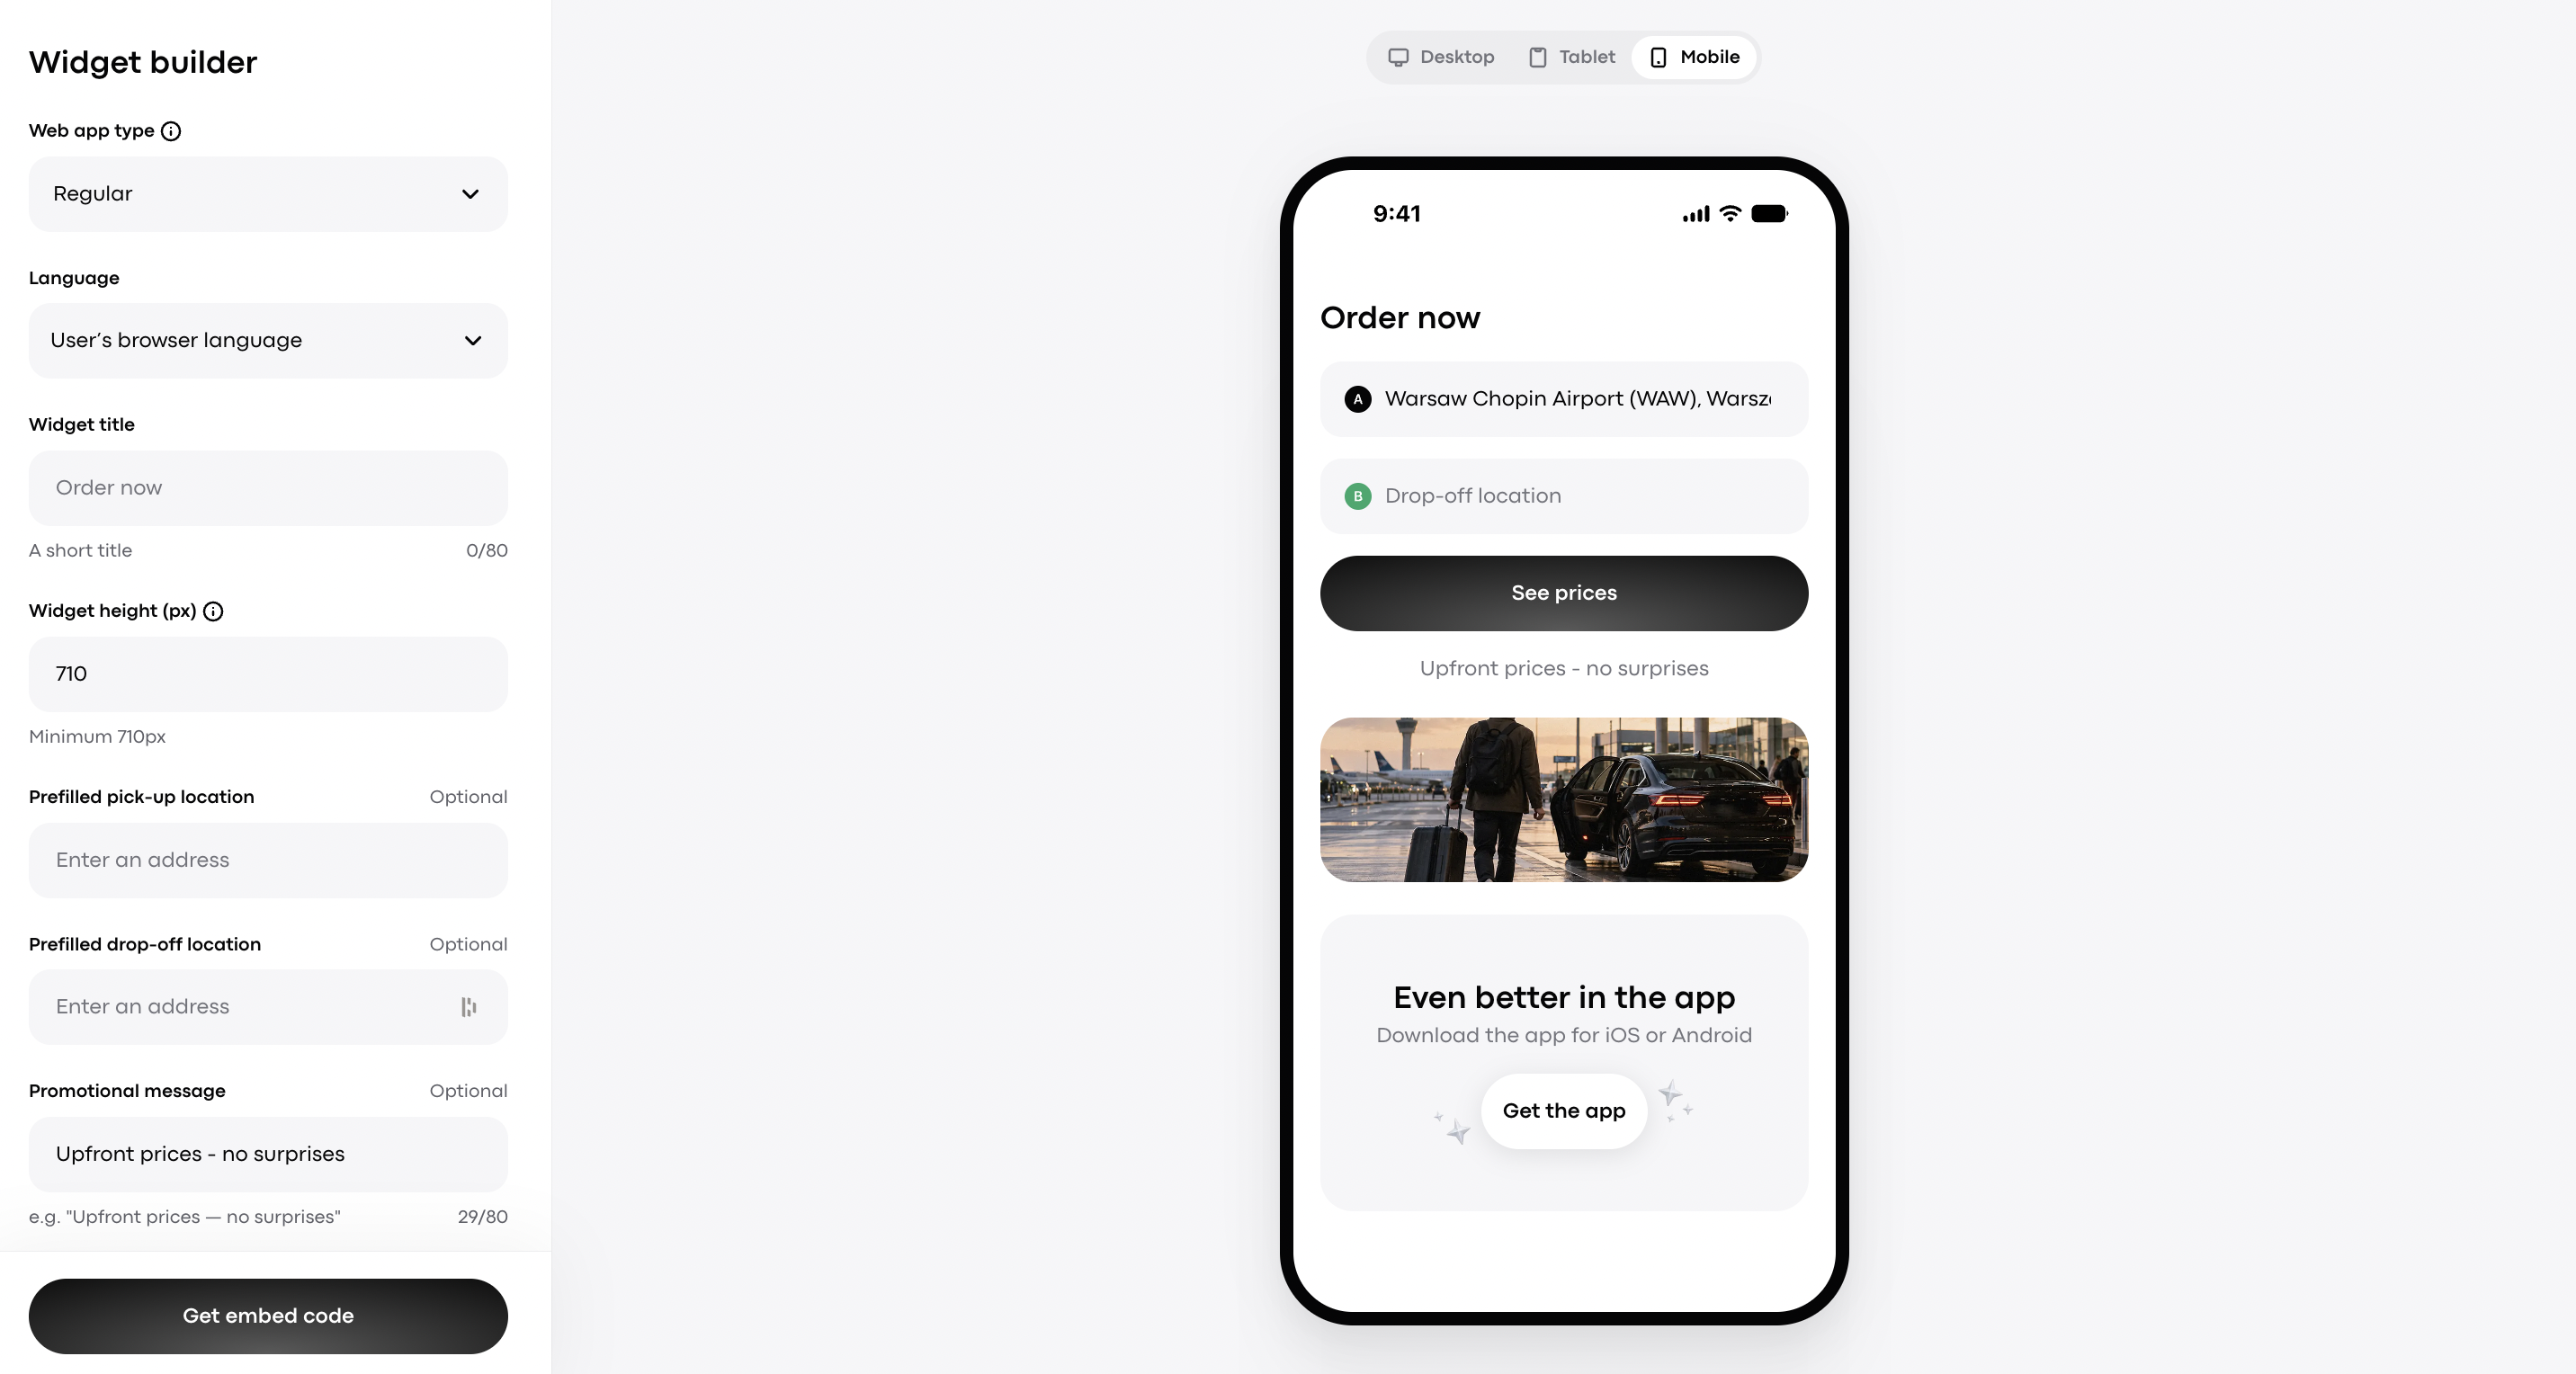
Side menu with configuration options on the left
Visualisation of the Web app on the right
Let’s get familiar with the configuration options and create your own web widget. Mind that every detail you specify in the side menu will be instantly reflected on the widget on the right.
1. Web app type
Depending on the service you provide, choose the Web app type from the list:
Regular (for ride services)
Delivery (for delivery services)
On-demand (for on-demand services with no drop-off address)
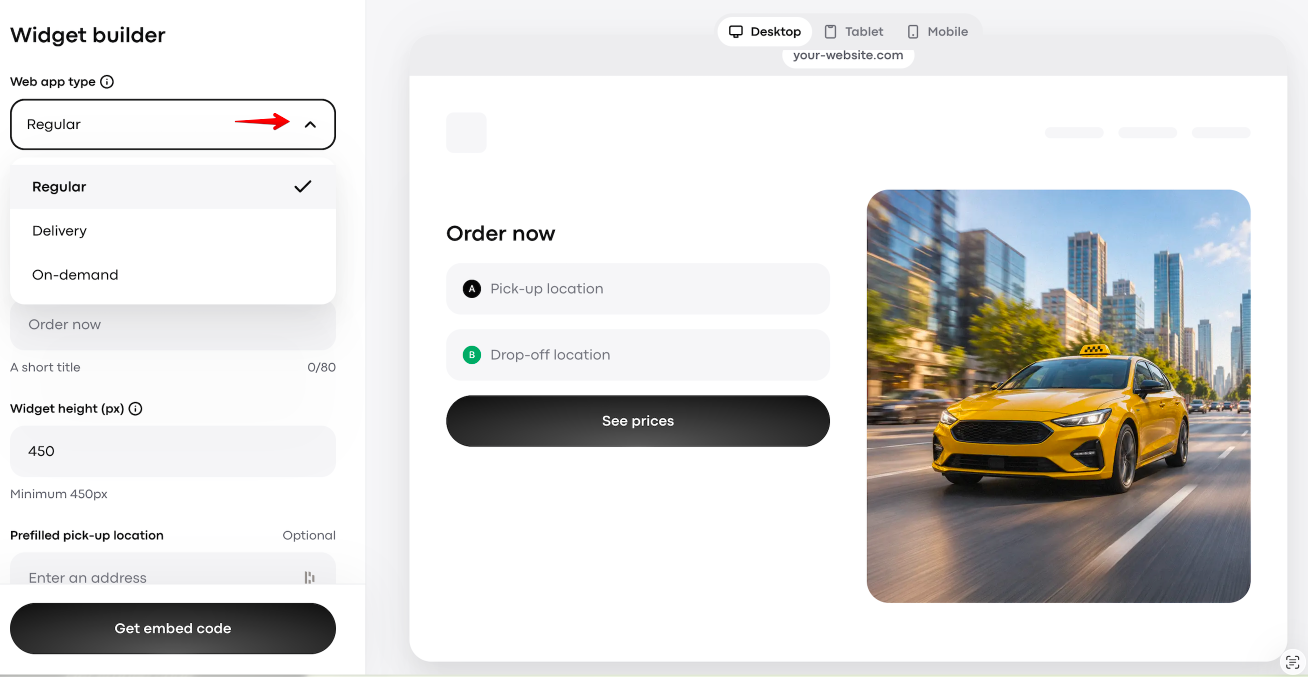
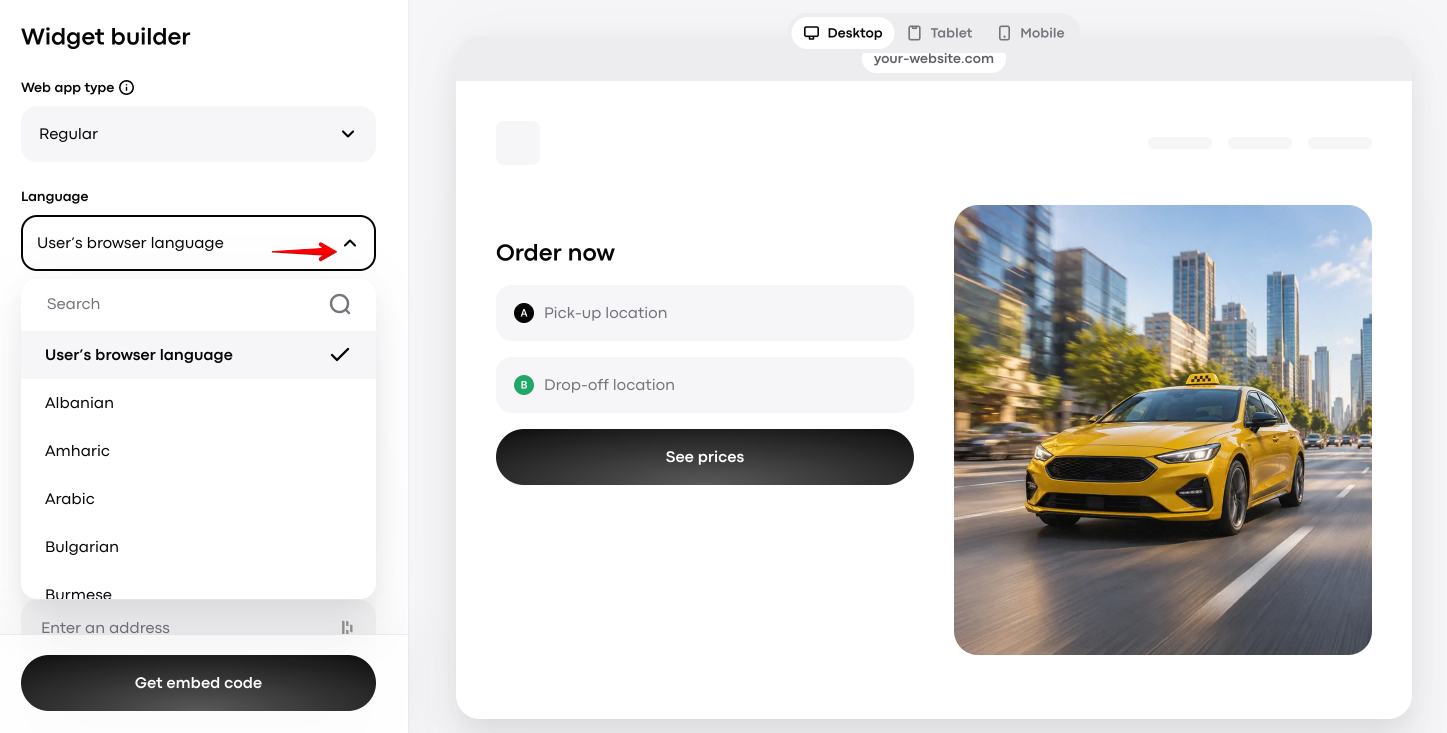
Language
Specify the language you want the widget to appear in to your website visitors. It can be either the visitor’s browser language (determined automatically) or any language available in the drop-down list.
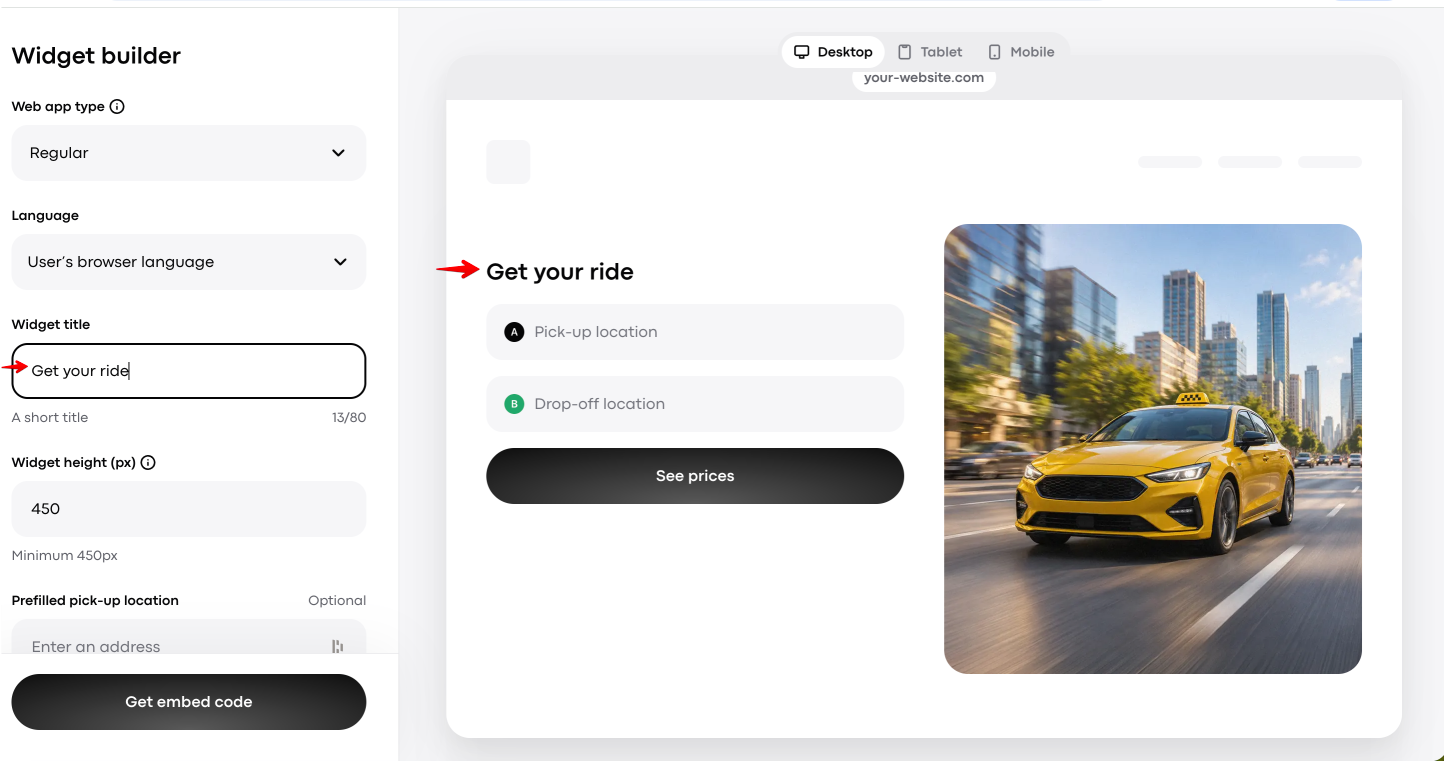
Widget title
Edit the default title “Order now” to suit your preferences.
Widget height
Specify the desired widget height.
The minimum default height is set at 450px. This is to leave enough space for address suggestions when the customer enters pick-up and drop-off locations.
As for width, the widget is designed to take up the full width available in the space where you embed it. This parameter can be adjusted on your own web page. We recommend leaving the widget full-width.
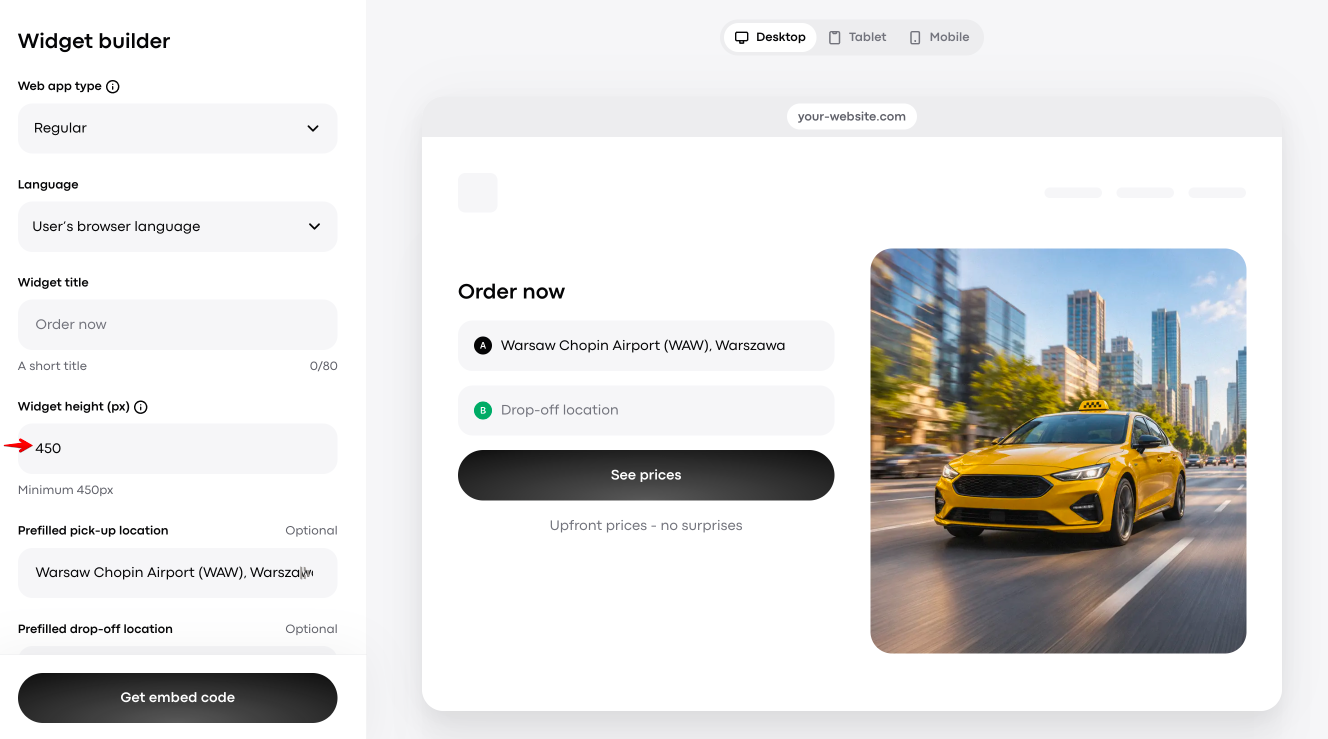
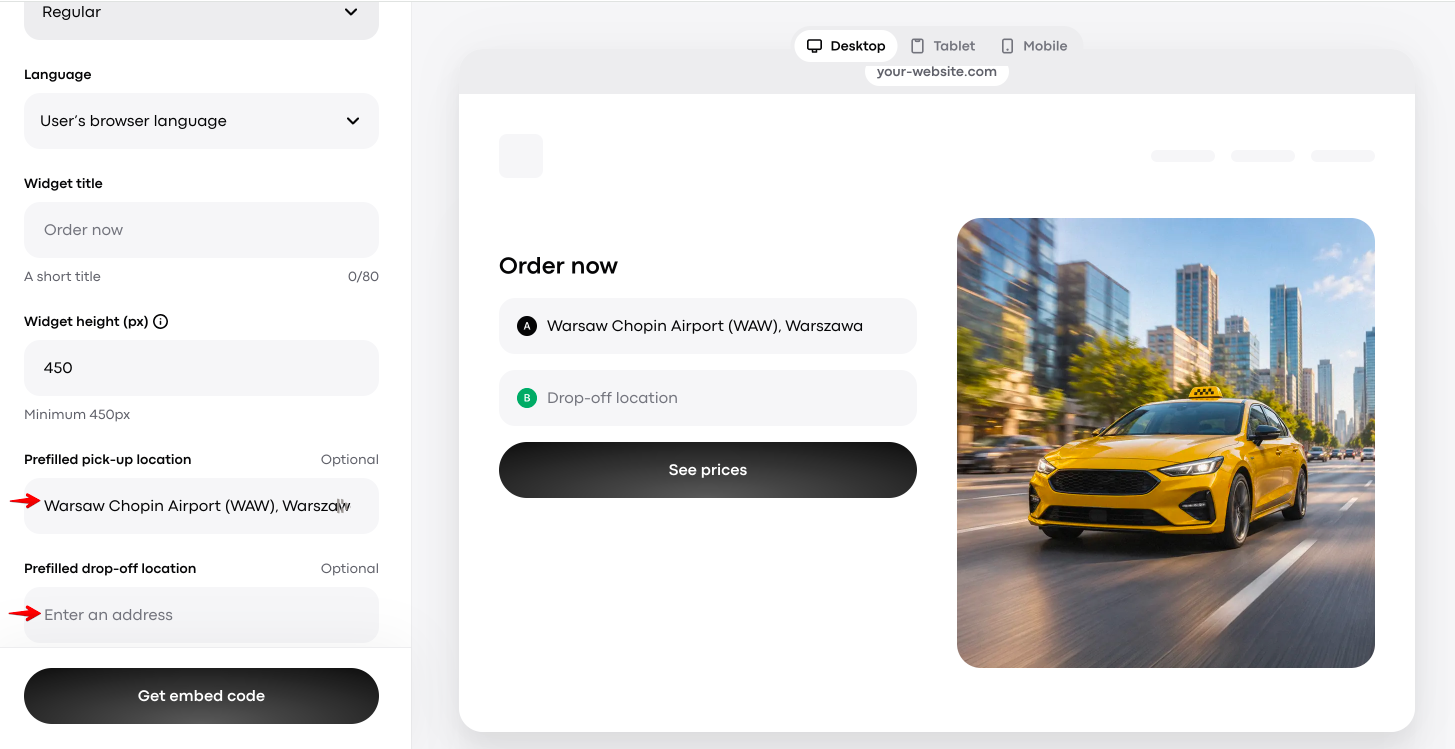
Prefilled pick-up and drop-off locations (optional)
In some cases, it makes sense to pre-fill the pick-up or drop-off location for your customers.
For example, an airport transfer company could set the airport as the permanent pick-up location. On the other hand, an event company might want to simplify booking for event attendees by pre-filling the drop-off spot.
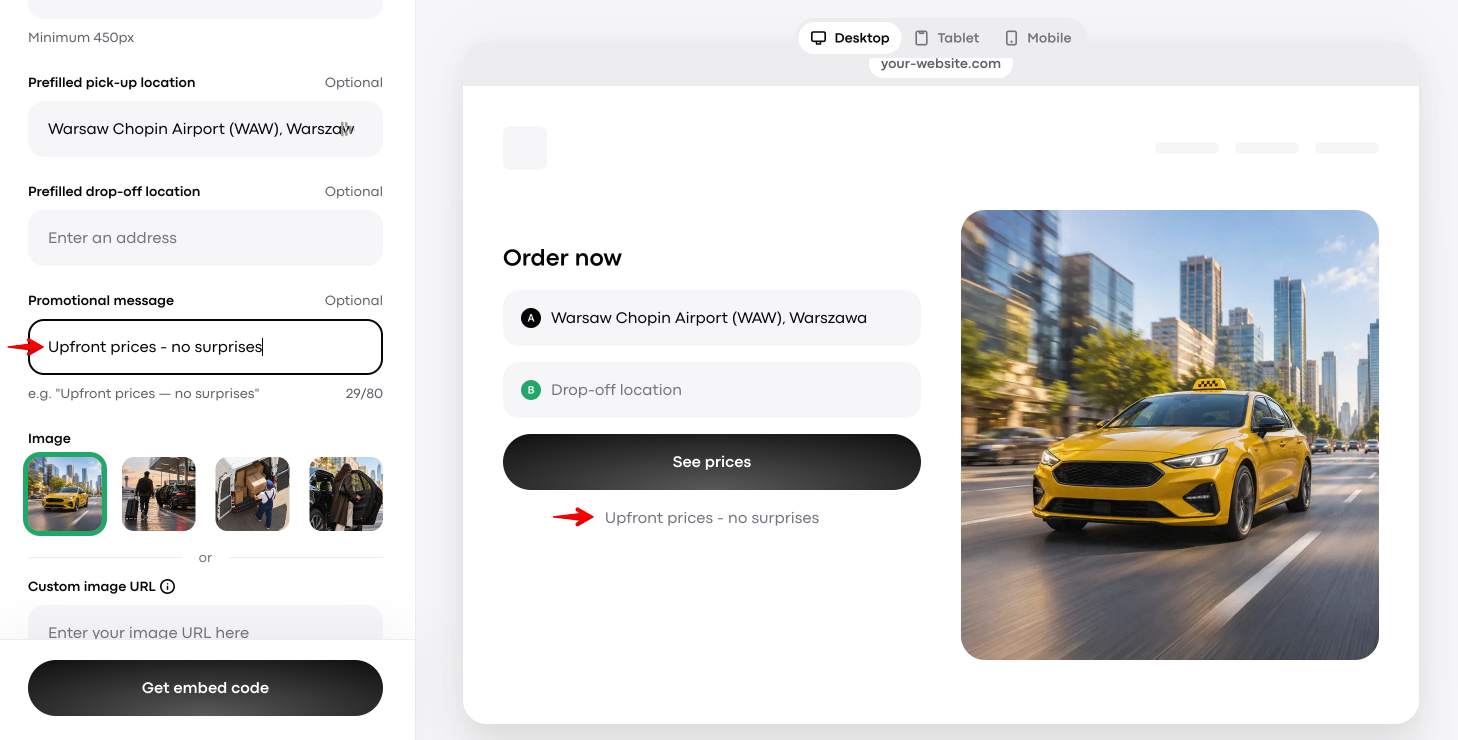
Promotional message (optional)
Add a catchy promo message to draw your customers’ attention.
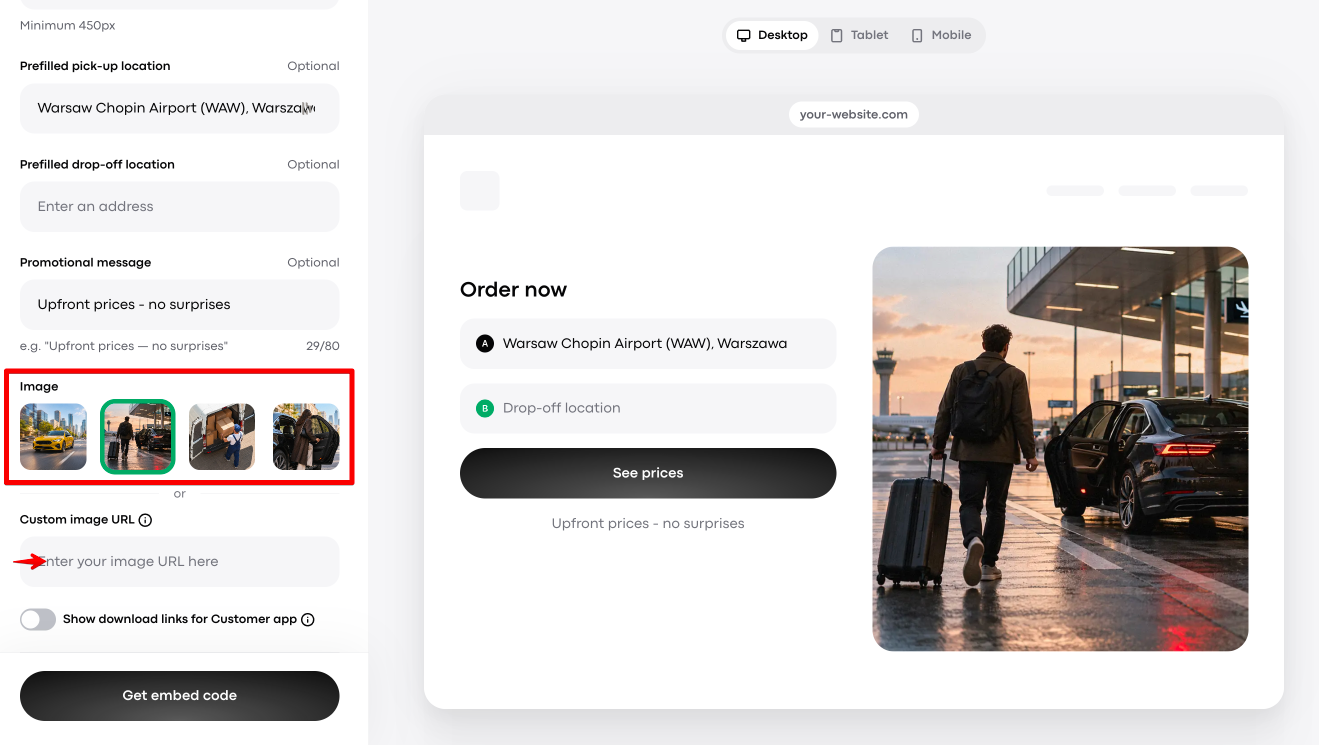
Image
Select one of the available images to represent your service in the widget.
Alternatively, you can paste a direct link to your own custom image in the Custom image URL field. The image should be hosted on an external website and publicly accessible without signing in.
If the link you paste is correct, you will see your custom image appear in the preview on the right, cropped to fit beside the form.
Toggle: “Show download links for Customer app”
Enable this toggle only if you have an Onde Customer app. You’ll see a few additional settings appear.
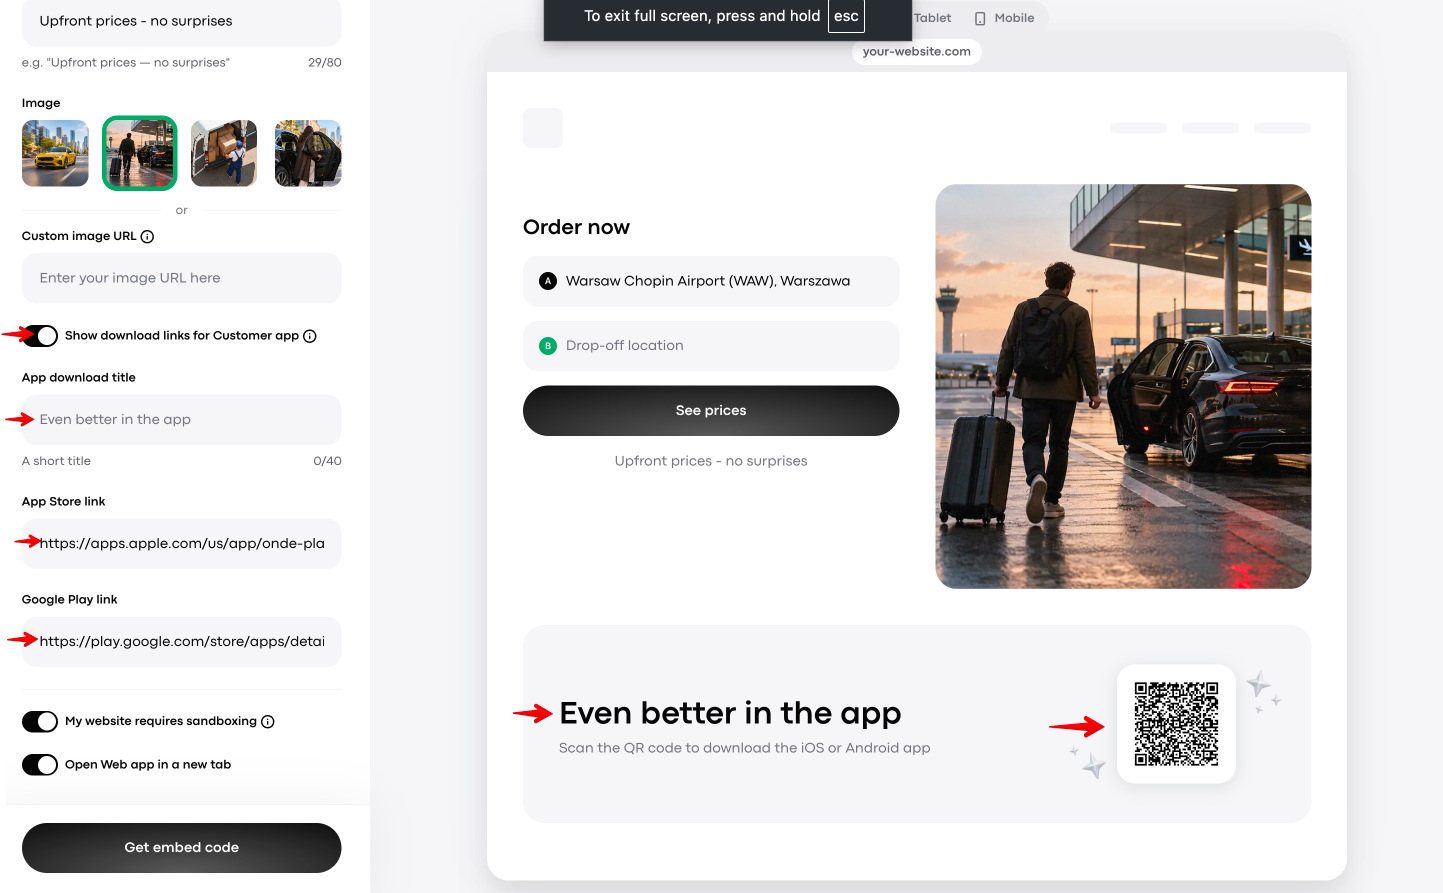
a. App download title
You can replace the default “Even better in the app” title with a custom one to encourage your users to download the app.
b. App Store link and Google Play link
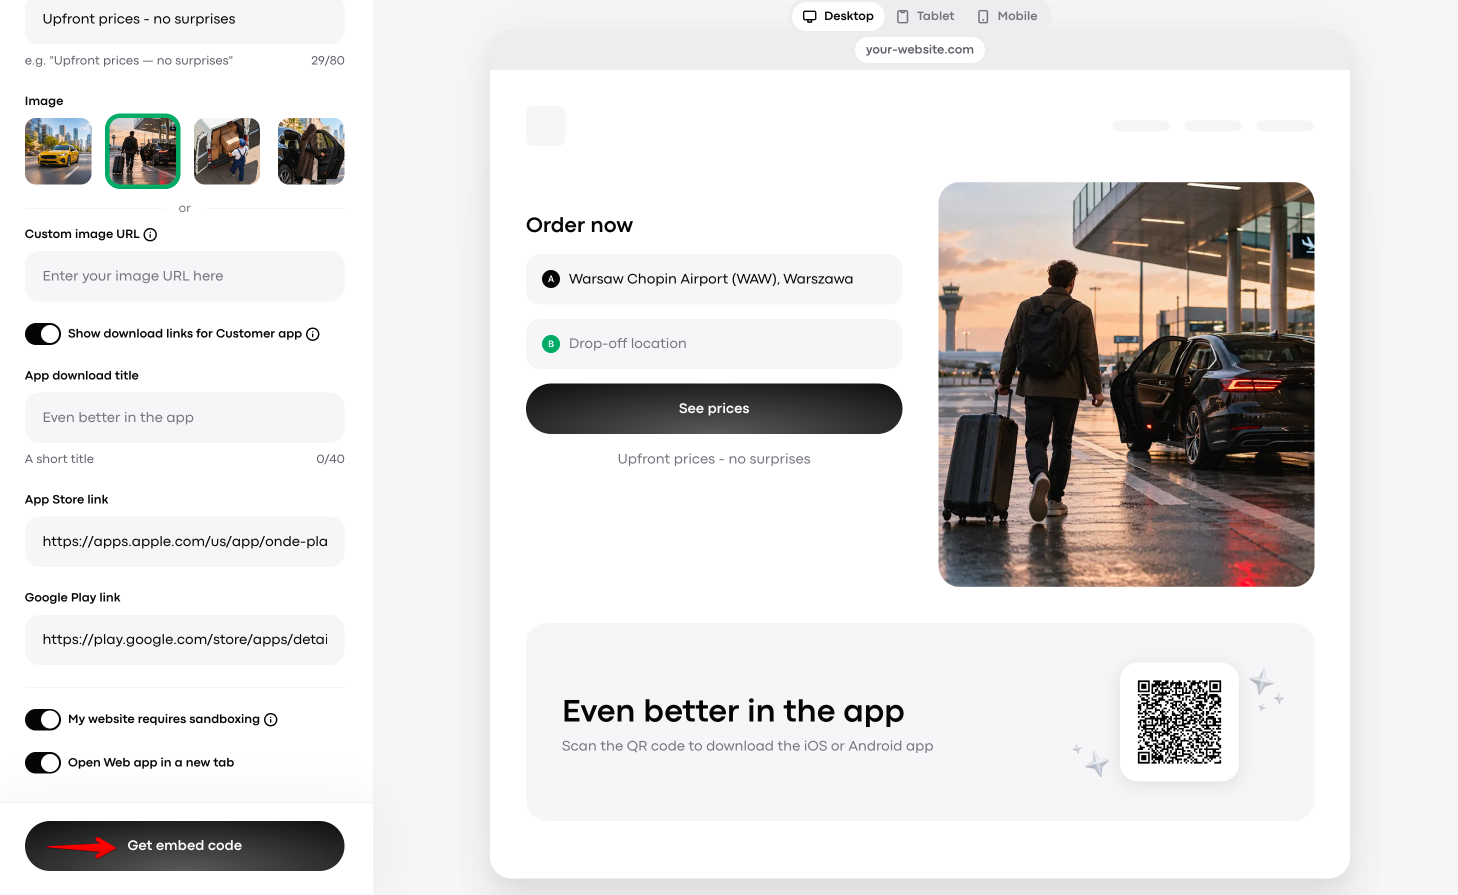
Put in the App Store and Google Play links into the respective fields. You’ll see a QR code appear in the preview on the right. This QR code will automatically direct your desktop customers to the right store for their device.
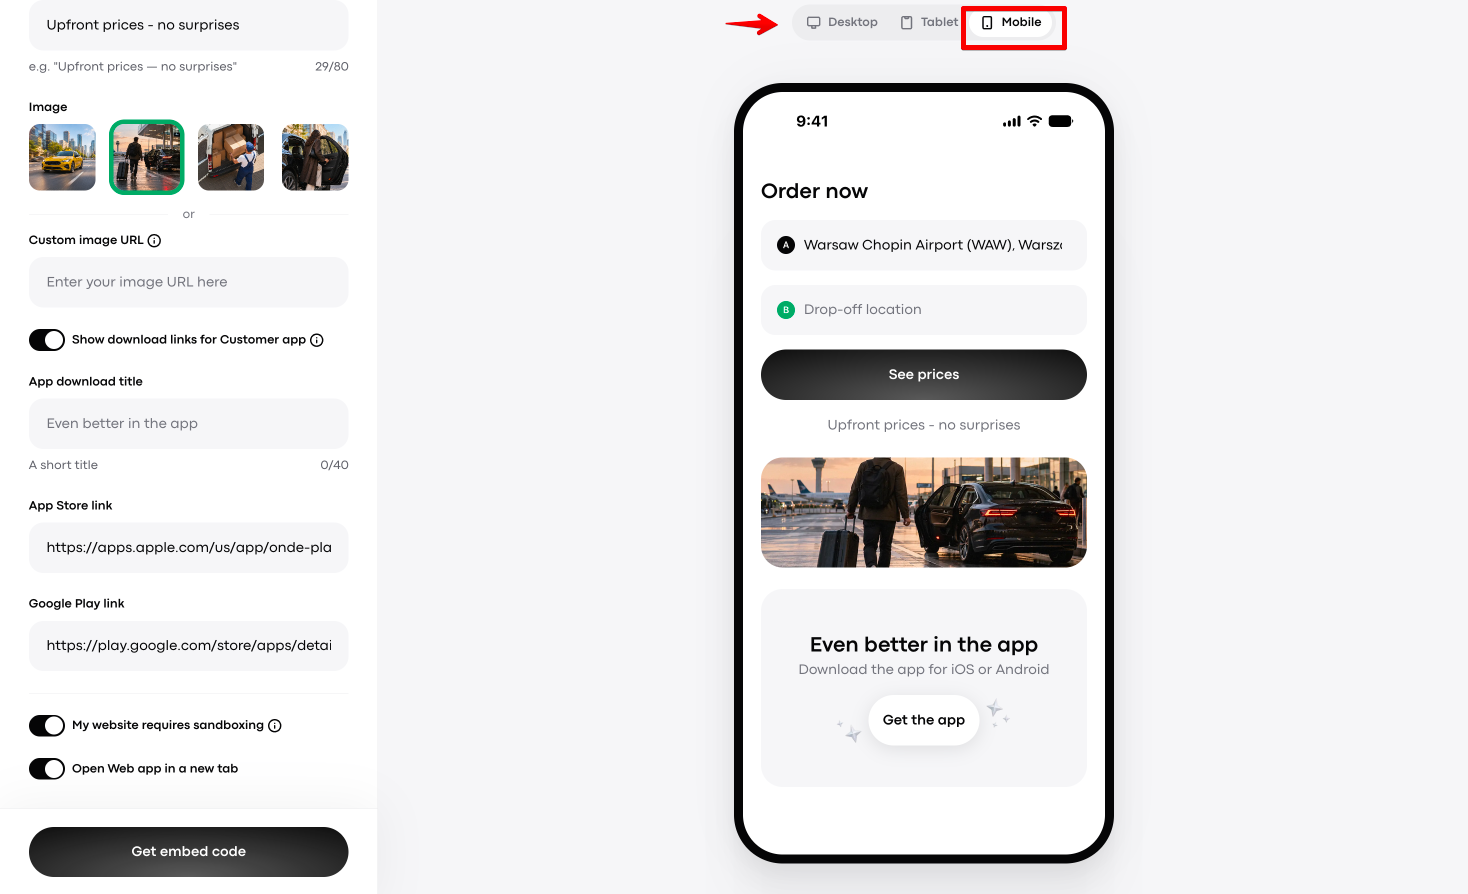
Note that on tablets and smartphones, your customers will see a button instead of a QR code.
Toggle: “My website requires sandboxing”
Sandboxing limits what embedded content can do on your website. Select this option only if your website administrator requires it.
When you select the toggle, the widget builder will add the necessary permissions to the embed code of your widget. Keep them unchanged to avoid issues with features such as location access and price display.
Toggle: “Open Web app in a new tab”
Enable this if you want the Web app to be open in a new browser tab.
Now that you have preset your custom widget, you can check how your customers will see it. Switch between Desktop, Tablet and Mobile tabs at the top of the preview section to visualise the display on a specific device.
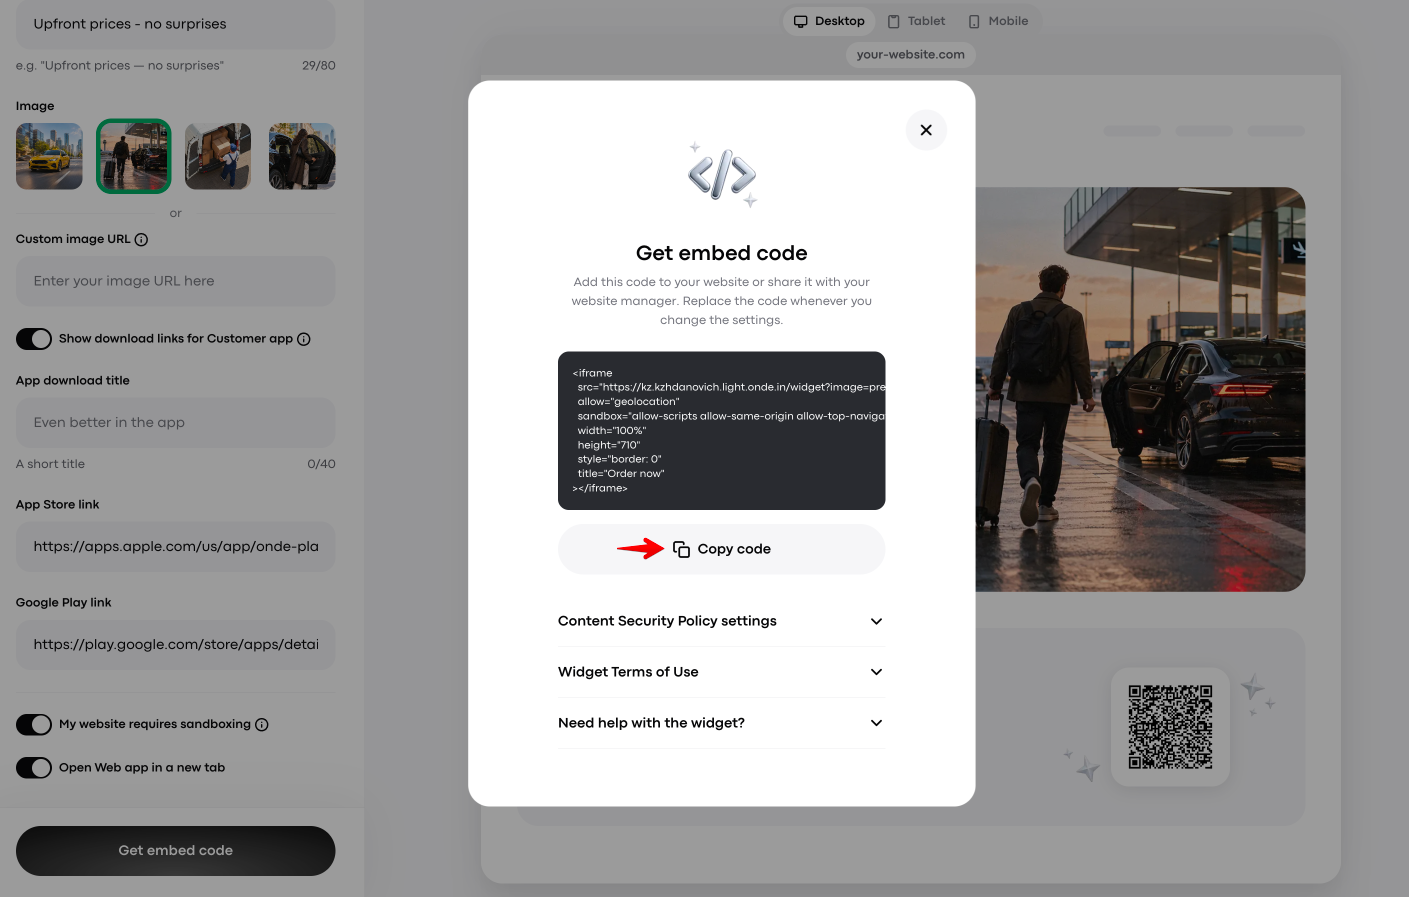
If you are happy with the setup and visualisation, tap the Get embed code button.
A pop-up window will appear. Before proceeding, review Content Security Policy settings and Terms of Use.
The Content Security Policy settings section contains a separate code snippet for websites that use such a policy. If that's the case for your website, ask your website administrator to add the widget's domain to the policy. Otherwise, the widget may appear as an empty space.
Use the Copy code button in this section to copy the snippet. When updating the policy, make sure to keep any domains that are already allowed.
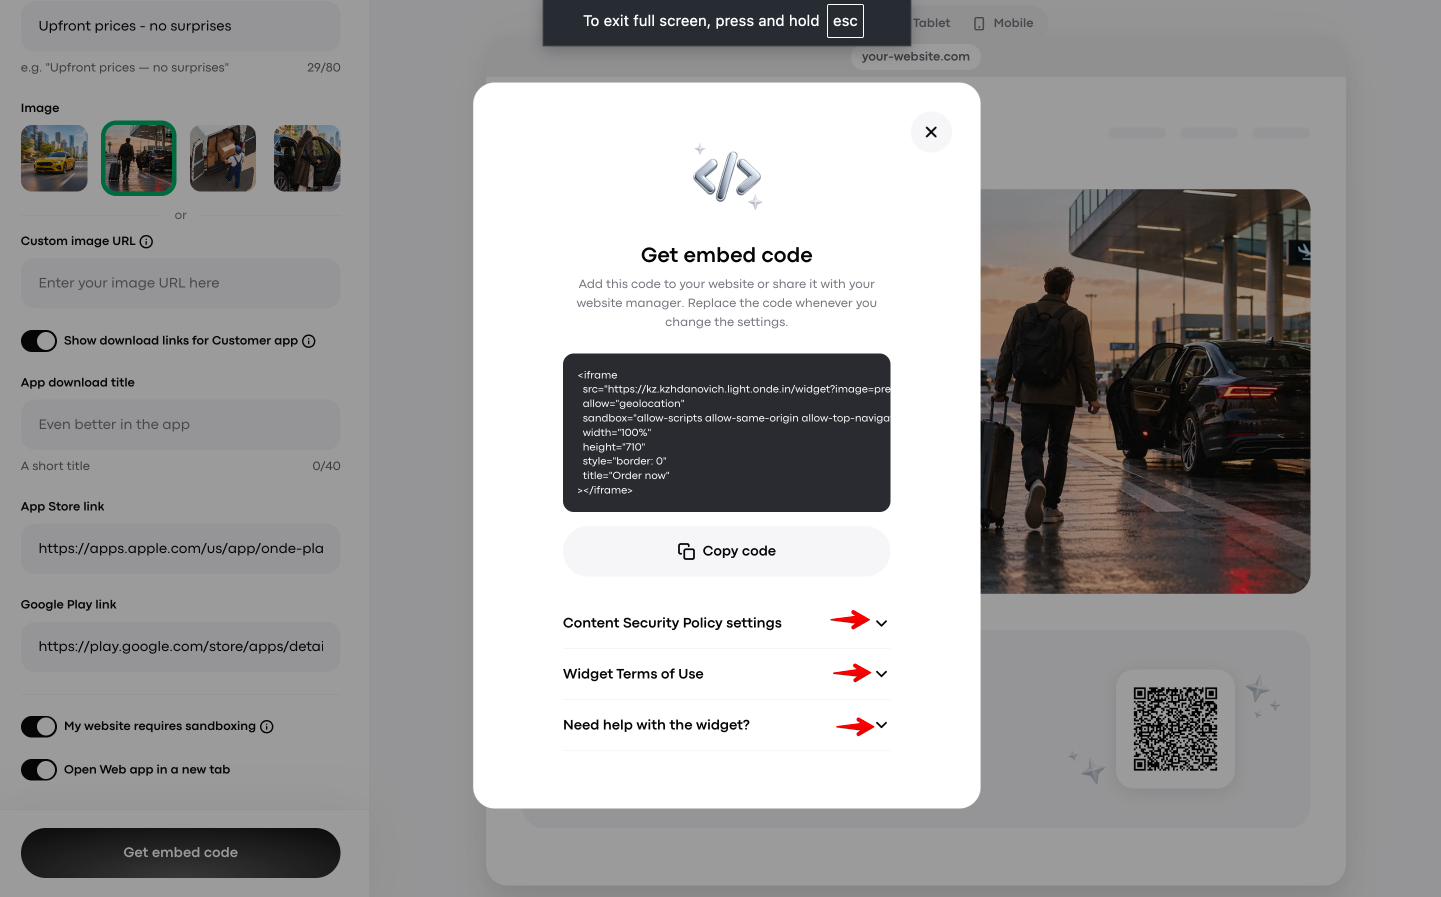
Next, expand the Widget Terms of Use section to review the terms and learn how the widget will work on your website.
”Need help with the widget?” section provides answers to frequently asked questions and redirects to [email protected] for further inquiries.
Once you're ready, press the main Copy code button to copy the generated embed code. You can add this code to your website yourself or share it with your website manager.
Well done — now you can enjoy the modern view and efficiency of the custom widget that blends perfectly with your website!
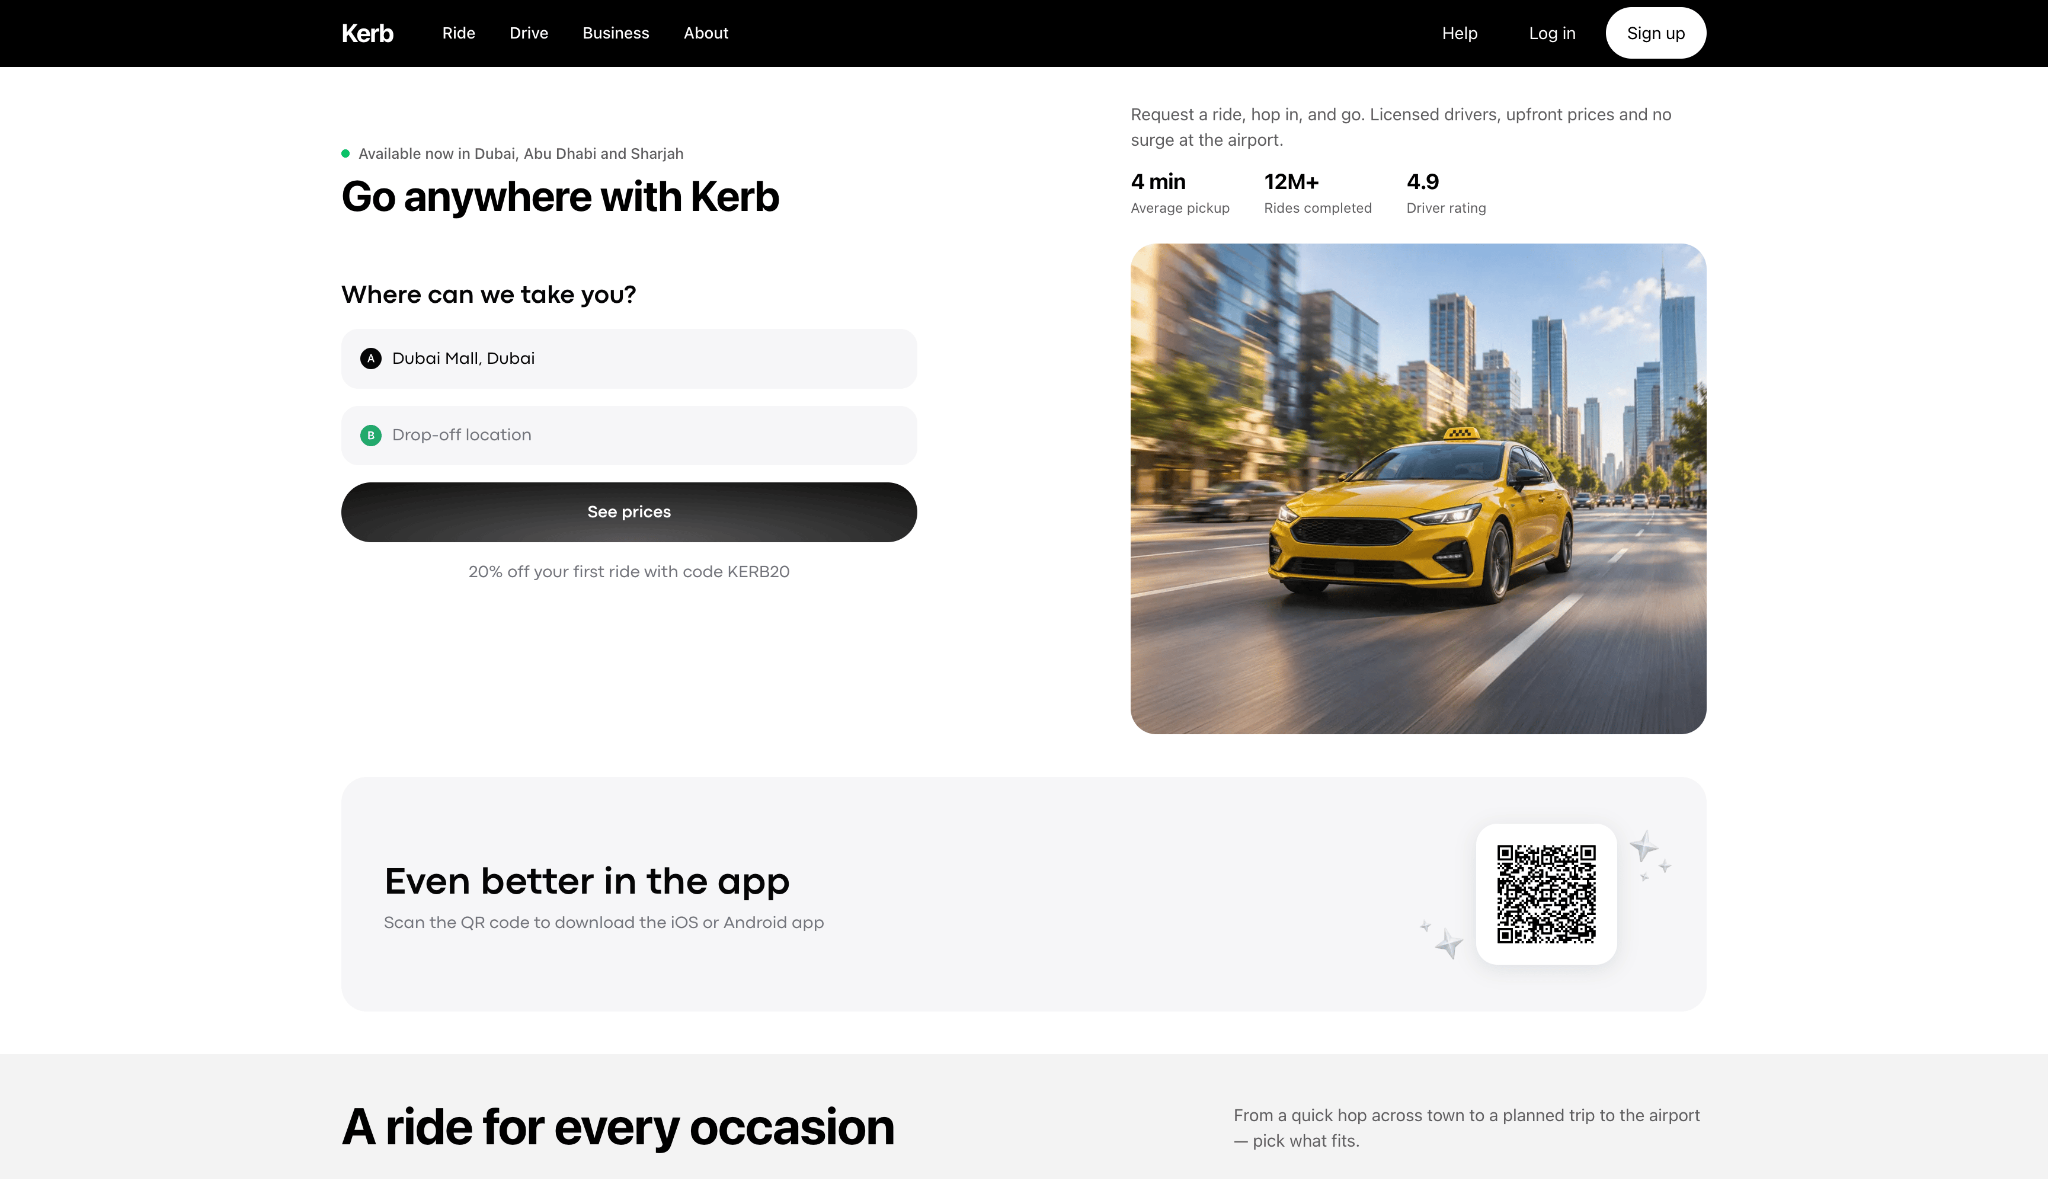
Need multiple widgets? You can create separate widgets for different websites or service types (for example, a regular service widget and an on-demand widget). Each widget has its own embed code.
Updated your settings in the widget builder? Remember to replace the existing embed code on your website with the new code to apply your changes.